Beginners Guide to Diamond Painting
Welcome to the sparkling world of Diamond Painting! This Beginner's Guide to Diamond Painting provides everything you need to get started. How does Diamond Painting work? Don't worry, we explain it simply. This step-by-step Diamond Painting guide is specially designed as a guide for Diamond Painting beginners and shows how easy and fun Diamond Painting can be for beginners.

Step 1: Choose your Canvas for your Diamond Painting
Choosing a suitable design is the first and most important step. For beginners, it is recommended to start with a smaller project such as a keychain, coaster, greeting card, notebook or Christmas ornament. This prevents you from feeling overwhelmed and helps you get familiar with the technique.
Tips for choosing a design:
- Start with an image with few details and large color areas.
- See if the design matches your personal taste and interior.
Step 2: Prepare your Workspace
A good workspace contributes to a relaxed and structured working method. In this Beginner's Guide to Diamond Painting, we share handy tips to optimally set up your workspace.
What do you need?
- A clean, flat surface
- Good lighting, such as a desk lamp or a light pad
- A storage system for your drills (for example sorting trays or grip bags)
- A comfortable chair and table at a suitable height
Extra tip: Use a light box to better distinguish the symbols on the canvas.
Step 3: Examine the Canvas and the Symbols
Before you start, take the time to look at the canvas carefully. How exactly does Diamond Painting work? It is important to get familiar with the symbols and the legend on the canvas before you begin.
What should you check?
- The legend on the side of the canvas, which shows the colors and corresponding symbols.
- The protective film covering the canvas – this must remain intact until you start working, so the canvas does not dry out. Want more tips to prevent drying out? Then check out our blog with tips!
- Check if you have all the necessary drills and tools.

Step 4: Sort the Drills
Before you start, it is handy to sort the drills. In this guide for Diamond Painting beginners, we share tips to do this efficiently.
How to sort efficiently?
- Use the shaking tray to sort the drills by color and pick them up easily.
- Label the color numbers on small containers or grip bags to keep everything organized.
- Only open the colors you need at that moment.

Step 5: Start Placing
Now the most fun part begins: placing the drills on the canvas! In this Beginner's Guide to Diamond Painting, we explain step by step how to do this best.
How to place the drills?
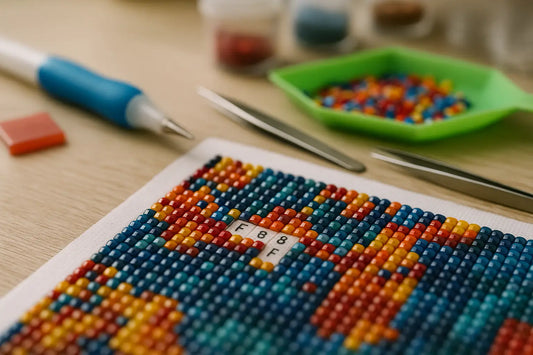
- Peel off a small part of the protective film from the canvas (work in sections to prevent the adhesive layer from drying out).
- Dip the tip of the drill pen in the wax so it picks up the drills.
- Use the drill pen to pick up a drill and carefully place it on the correct symbol on the canvas.
- Press the drill gently to ensure it stays firmly on the canvas.
- Work organized by either working by color or filling the canvas section by section.
Extra tips:
- Use tweezers to correct or place drills more precisely.
- Work from top to bottom to prevent accidentally knocking off already placed drills.


Step 6: Check and Adjust - Beginner's Guide to Diamond Painting
Regularly take time to check your work.
What to look for?
- Are all drills placed correctly and straight?
- Are the drills placed tightly together?
- Are there empty spots or shifted drills that need correction?
Use a roller if necessary to press the drills extra firmly.
Step 7: Complete your Artwork - Beginner's Guide to Diamond Painting
When you have placed all the drills, it is time to finish your artwork.
How to complete your Diamond Painting?
- Use a roller to press the drills firmly in place.
- Apply a sealer to fix the diamonds (optional but recommended if you want to frame or hang your artwork).
- Remove any excess wax or glue residue with tweezers.

Step 8: Present your Work
Now that your Diamond Painting is finished, you naturally want to give it a nice place. But can a Diamond Painting also be hung outside? You can read more about this in our blog about outdoor hanging!
Ways to display your work:
- Framing and hanging
- Hanging with clips or canvas frames
- Use as a gift for a friend or family member
Extra Tips Diamond Painting for Beginners
✔ Work in small sections to prevent the adhesive layer from drying out.
✔ Save leftover drills in a separate container, they may come in handy later.
✔ Use tweezers for precise placement and correction of drills.
✔ Be patient! Diamond Painting is a relaxing process – enjoy it!

Diamond Painting is a relaxing and creative hobby that, with the right guidance, is easy to learn. But how does Diamond Painting actually work? Thanks to our guide for Diamond Painting beginners, you get all the tools and tips you need to start successfully. In addition, the step-by-step Diamond Painting guide helps you master each part easily. In short, discover how fun it is to create your own sparkling artwork. So, start today and enjoy a relaxing and rewarding project!
Have fun with your Diamond Painting adventure!


