Diamond Painting Checkerboard Method: How to Use This Clever Technique
Diamond painting is for many the ultimate way to relax and create something beautiful. The calming process of placing the small, sparkling stones not only produces a stunning final result, but also creates a moment of pure mindfulness. Whether you're a beginner diamond painter or have years of experience, there are always techniques that can help you take your work to the next level.
One of the most popular and effective techniques is the diamond painting checkerboard method. This method not only results in a neater and more professional finish, but often also makes the workflow more enjoyable and efficient. In this article you will discover step by step what the checkerboard method in diamond painting is`, how you can apply them easily and why you can work with them faster, neater and more enjoyably.`

What is the checkerboard method in diamond painting?
The checkerboard method is one of the most popular diamond painting techniques onder zowel hobbyisten als ervaren makers. This method is used to perfect straight lines to create, giving your work a neat, professional appearance. The nice thing is that the technique works with both round and square stones, making it suitable for almost any project.
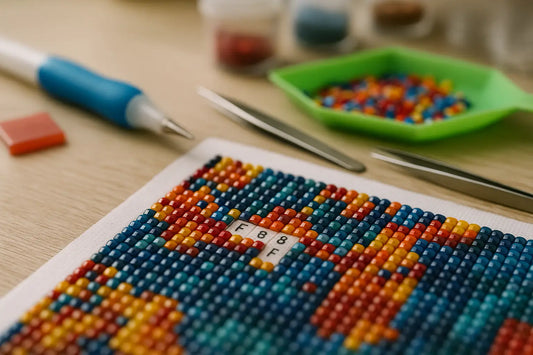
The principle is simple: instead of placing your stones directly next to each other, you always leave one square empty. This creates a pattern reminiscent of a classic checkerboard or chessboard. When you've worked a section of the canvas in this way, go back and fill in the empty squares. This ensures the stones naturally align themselves.
Why does this technique work so well?
When you place them directly side by side, a slight deviation can sometimes occur, causing rows to run crooked or small gaps to remain visible. The checkerboard method breaks this, because the open spaces when filling in indicate exactly the right spot for the next tile. Especially with square drills you often hear that satisfying ‘click’ sound when the little stone falls perfectly into place.
Benefits of this approach:
- Clean lines without misaligned stones – your end result looks professional and neat
- Less chance of small gaps or overlapping drills – perfect for precision work
- Extra fun and motivating for large areas with a single color – keeps the work interesting
- Suitable for both beginners and advanced users – easy to learn, big impact
How do you use the checkerboard method in diamond painting?
The nice thing about the diamond painting checkerboard method is that you can start working with it right away, regardless of your experience level. This technique doesn't require any special materials or complicated tools, just your usual diamond painting set and a bit of patience.
By working in a consistent pattern, you ensure your little stones always line up neatly. Especially on larger areas with a single color, you'll notice how much neater and more organised the work becomes.
Step-by-step plan:
-
Choose your work surface
Open a small section of your canvas by carefully folding back the protective film. Preferably work in sections of 5x5 or 10x10 centimeters, so the adhesive doesn't dry out and no dust or dirt gets on it. -
Place stones alternately
Place a stone in its spot, then skip one square and place the next stone. This creates an alternating pattern of stones and empty squares. -
Work in a fixed pattern
Choose whether you want to work horizontally or vertically. Maintain this across the entire surface so you achieve a neat and consistent checkerboard pattern. -
Fill the empty spaces
Once you've completed the pattern on your chosen workspace, go back to the empty slots. Place the missing pieces there; they fit perfectly and form a beautiful whole. -
Enjoy the result
Take a moment to see the difference. You'll notice the lines are cleaner, the stones fit together better, and the overall result looks professional.
💡 Extra tip: Are you working with square beads? Then a light pad is indispensable for even more precise lines. Discover all the benefits in our article The benefits of a light pad for Diamond Painting.
📍 Here you could include a step-by-step photo series that clearly shows the process – for example one image per step, from opening the work surface to the final result.
Why choose the checkerboard method?
The diamond painting checkerboard method It's no wonder this is one of the most talked-about techniques in the diamond painting world. Both beginners and experienced crafters find that their work not only becomes neater, but that the whole process also becomes more enjoyable.
While the standard method can sometimes lead to crooked rows or small gaps, the checkerboard method delivers a tidy, organized result. It also makes the hobby more varied and motivating, especially when you're working on a large project with a lot of repetition.
Key benefits:
- Perfect straight lines – You create a professional finish where the stones line up neatly without shifting.
- Less monotonous – Especially with large areas of color, working in a checkerboard pattern offers more variety, helping you stay focused and motivated for longer.
- Suitable for children – The alternating pattern helps keep their attention and promotes neater, straighter rows.
- Faster diamond painting with the checkerboard method – Because the stones fall into place better, you need to make fewer corrections, which saves time.
- Improved alignment for square stones – The 'click' effect when filling in empty boxes provides extra precision and a delightfully satisfying feeling.
💡 Extra tip: Do you want more variety while working? Find out in our article Fun Diamond Painting Methods: 5 Creative Techniques to Try how to combine the checkerboard method with other clever techniques for even faster and more fun diamond painting.

Tips for even better results
Do you want to get the most out of the diamond painting checkerboard method? With a few extra techniques and smart tools you can make your work even more polished, faster, and more professional. These tips help you achieve a finished result you can be proud of every time.
Helpful tips:
-
Use a ruler or multi-placer for extra-straight rows
A ruler helps you place your first row perfectly straight. If you work with square drills, a multi-placer ensures you can place multiple drills at once without them ending up crooked. -
Begin at a corner or edge for more grip
By starting at a clear edge or corner of your canvas, you immediately have a straight line to build on. This prevents the pattern from gradually becoming skewed. -
Work in small sections to preserve the tackiness of the adhesive
Fold the protective film back only a small amount, for example 5x5 or 10x10 cm. This keeps the adhesive clean and tacky, and prevents dust or hairs from sticking to the canvas. -
Combine the checkerboard method with other diamond painting techniques for variety
Alternate the checkerboard method, for example, with the block method or the strip method. This can be useful in different parts of your project and makes the work less monotonous.
💡 Extra tip: Use a lightbox under your canvas for extra visibility of the squares. Especially with dark colors or in evening light, this makes placing the stones much easier.
💡 Want to know more? In our article Where do you start with diamond painting? you can read exactly how to start smart for the best result.
Conclusion: try the checkerboard method today
Whether you're just picking up your first set of bricks or have already completed dozens of projects, the diamond painting checkerboard method is a simple yet effective technique to take your creations to the next level. By alternately filling in squares and then filling the empty spots, you get crisper lines, a neater finish and often a more enjoyable workflow.
The result? A piece of art that not only looks beautiful, but is also proof of your precision and dedication. You'll notice that your diamond painting looks more professional and that you enjoy the process more. Especially when you have large areas in the same color to work on.
Why wait? Grab your current project, or pick a new canvas and try the checkerboard method right away. Who knows — this might become your favorite technique too, just like it has for many other diamond painters.
✨ Ready to try the checkerboard method yourself? Discover our complete collection diamond painting kits and choose the perfect project to get started on right away.
🎥 See the technology in action: In this YouTube video tutorial See step by step how to apply the diamond painting checkerboard method for neater and more beautiful results.


